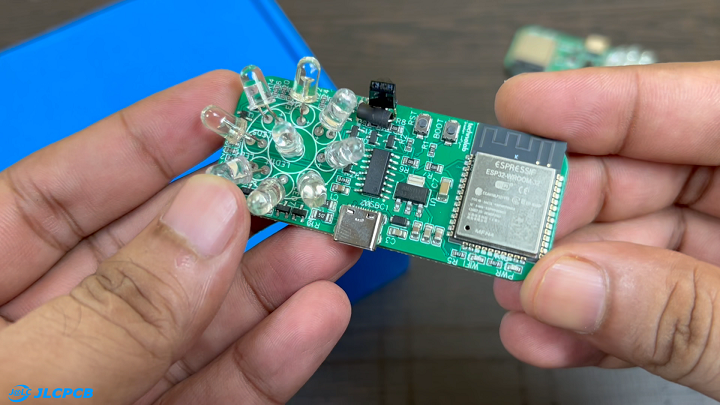
Using this board, you can control your TV, air conditioner, or any IR-based device directly from your smartphone, from anywhere in the world.
This project allows you to control any device that uses an IR remote, not just TVs and ACs.
If you have multiple IR remote-based devices, this project is perfect for you. Now you can replace all the remotes in your house with your smartphone.
To make this project, I am using the KME Smart IoT Cloud, which is free and very easy to configure. I have already made a dedicated video on KME Smart IoT Cloud where I explain everything in detail. Check out that video if you want to learn more about KME Smart IoT Cloud.
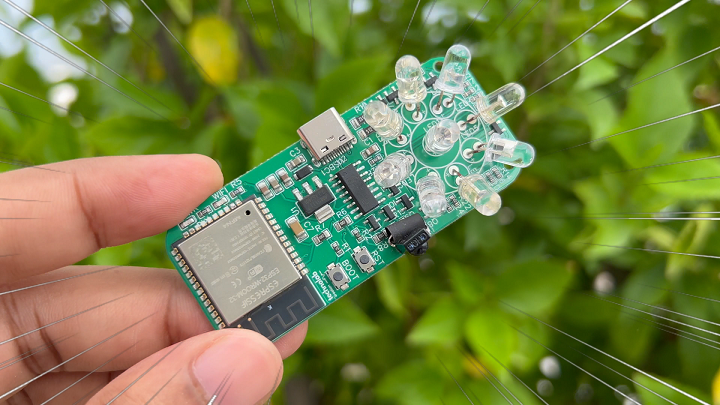
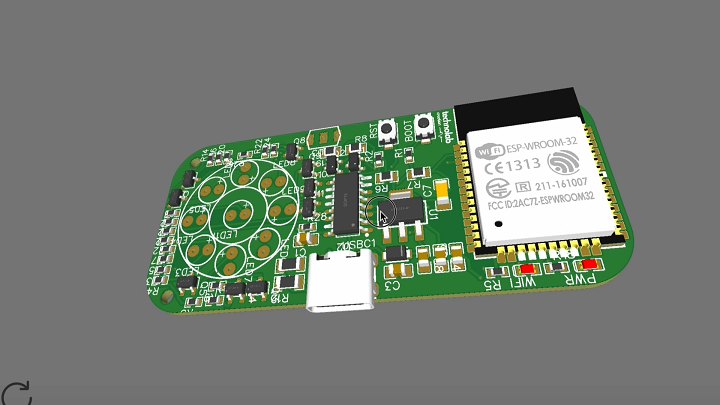
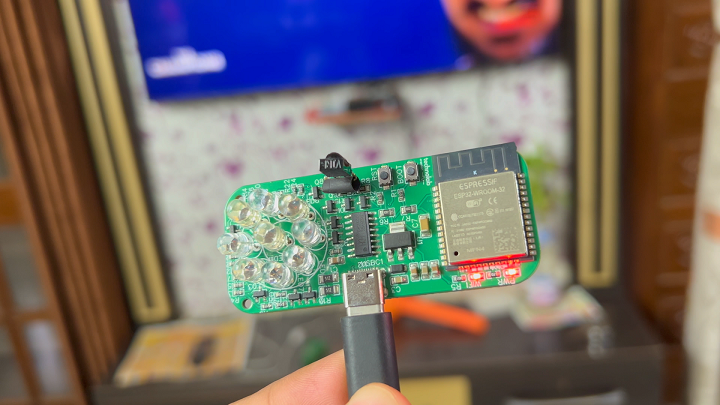
To make the project small and compact, I designed a custom PCB for it. After finalizing the design, I placed an order with JLCPCB for PCB manufacturing.
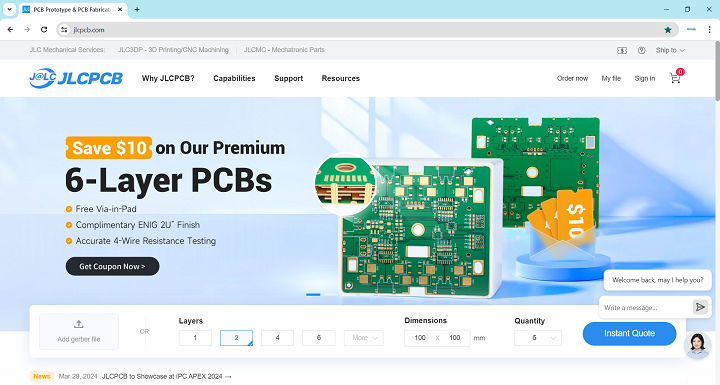
JLCPCB.
JLCPCBis a leading PCB manufacturing company in China, known for providing high-quality and reliable PCBs at very affordable prices.
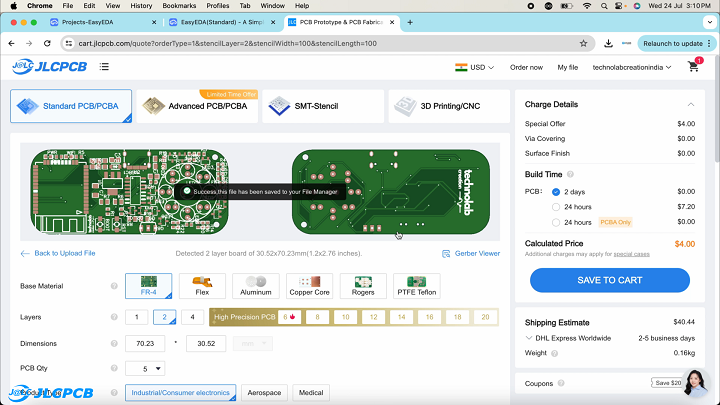
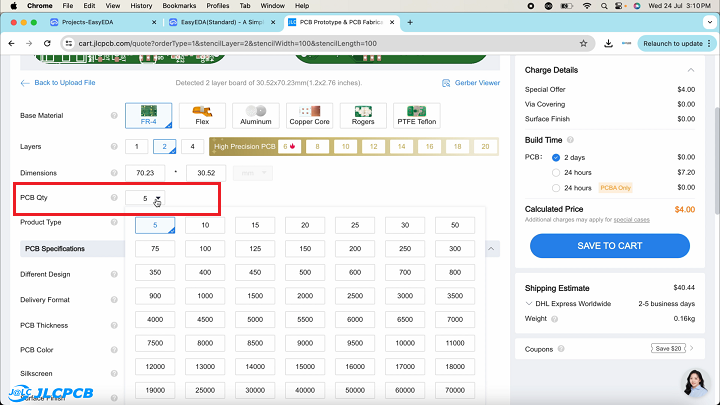
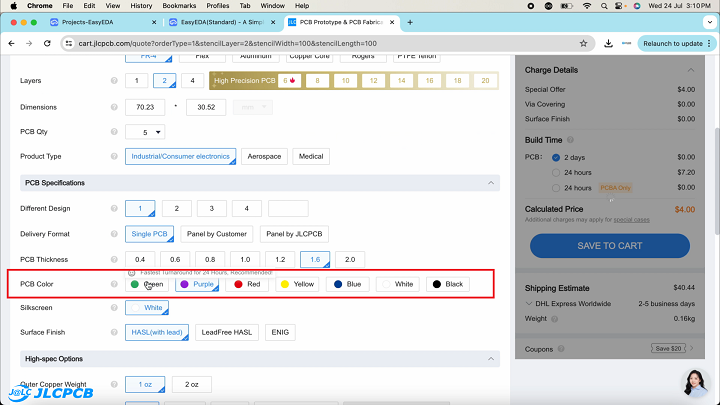
Ordering PCBs from JLCPCB is very easy. You just need to upload the Gerber file of your PCB, select the quantity and color masking, and then click on “save to cart” to complete your order. If you select the fastest shipping method, your PCB will be delivered to your desired location within a week.
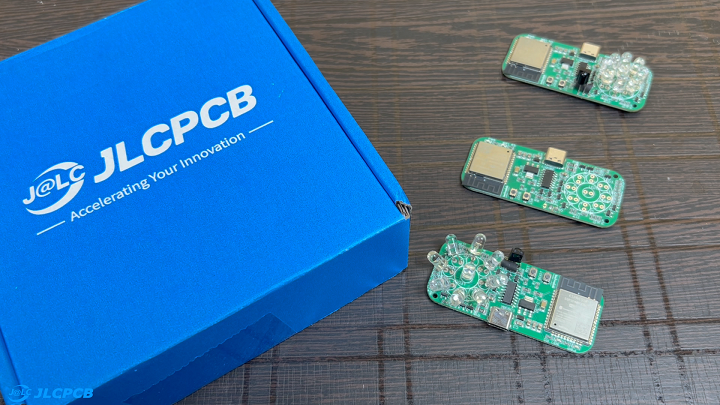
After five days, I received my PCB in very good packaging. As usual, the quality of the PCB was premium, and it looked very professional. The green color PCB looked very beautiful.
In addition to PCB manufacturing, JLCPCB also provides PCB assembly services, 3D printing services, and has recently started offering multicolor silkscreen PCB manufacturing services. If you have any PCB projects, I highly recommend trying out JLCPCB for your next project.
Firmware Configuration.
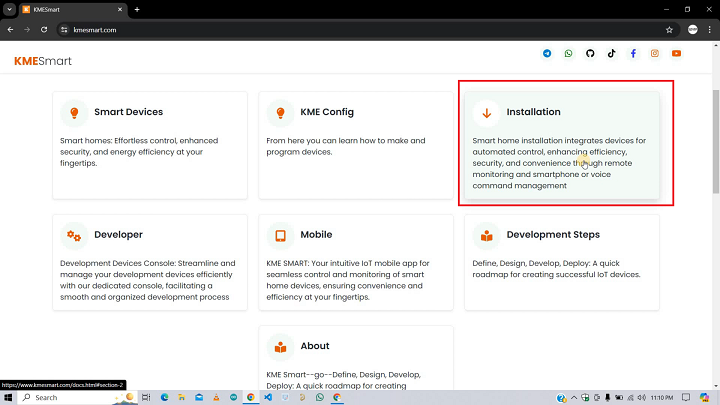
Open the KMEsmart.com website. Once on the website, click on the “Installation” option. This page contains all the information about installation, including how to pair in different modes, push-button pairing, pairing through Smart Connect, and pairing through Access Point.
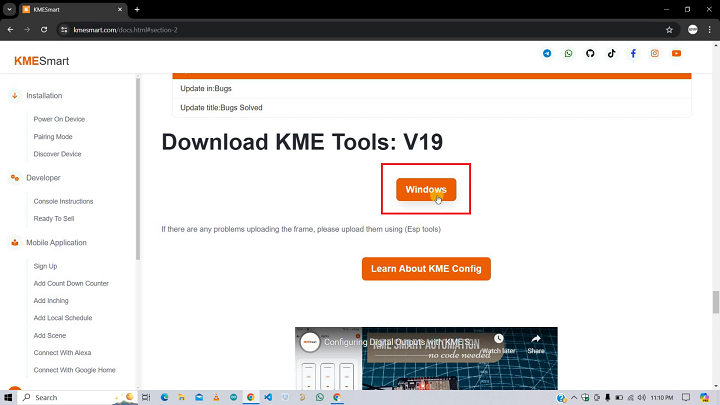
Scroll down to find the KME tool for flashing the firmware onto the ESP32. Click the button to download the KME Tool for firmware flashing. After downloading, open the file and extract the compressed .zip file.
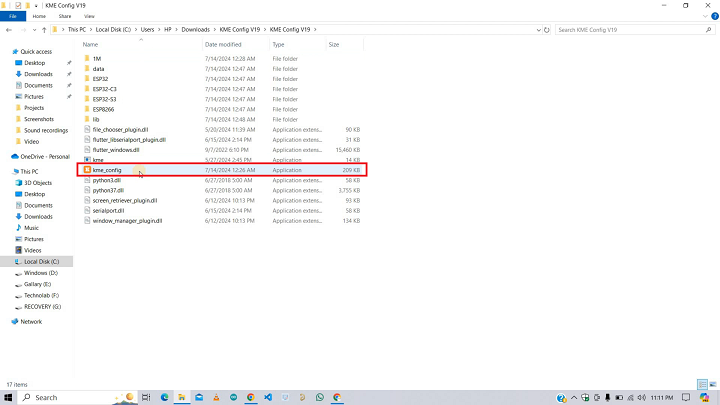
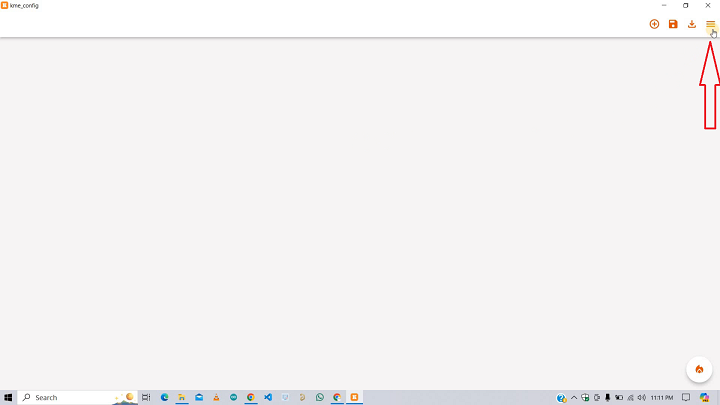
Open the extracted folder to find the KME config application. Launch the KME Application to flash firmware onto the ESP32 using this tool. In the top right corner, click on the three-dash icon.
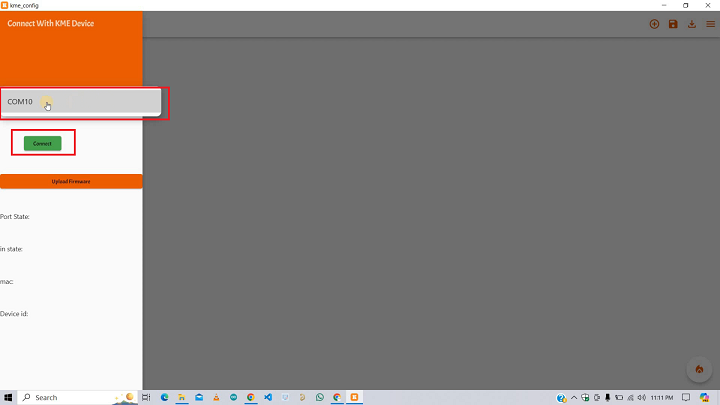
Connect the ESP32 to your computer. From the application, select the COM port to which your ESP32 is connected, then click the “Connect” button.
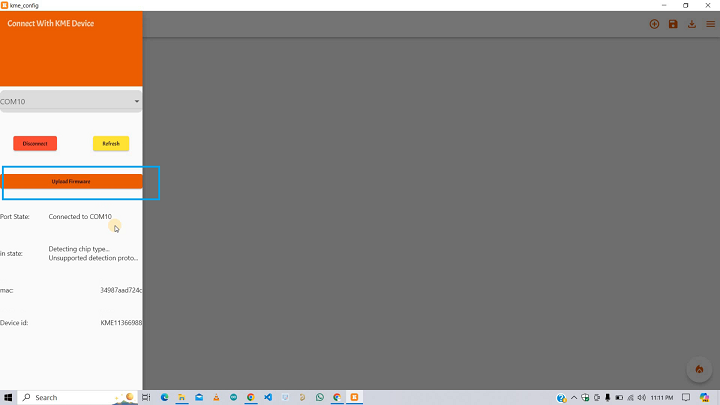
Click on “Upload Firmware.” The KME Tool will automatically detect the connected ESP boards and upload the firmware—simple and easy.
Once the firmware is successfully uploaded and ready for configuration, click on the plus icon button in the top right corner.
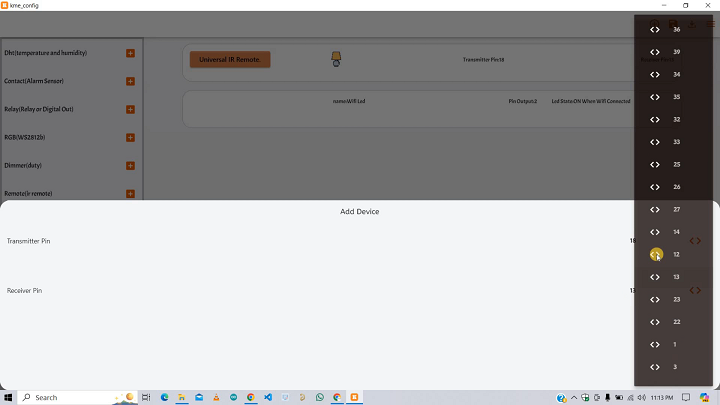
From here, you can add the devices you want. Options include DHT Sensor, Contact, Relays, RGB, Dimmer, Remote, IR Hub, WiFi LED, and pairing button. There’s also an option for an analog sensor and a fan.
In this Project we only require the IR Hub option and the WiFi LED option. Configure these one by one. Click to change the name of the device; you can name it whatever you like. I’ll name it Universal IR Remote.
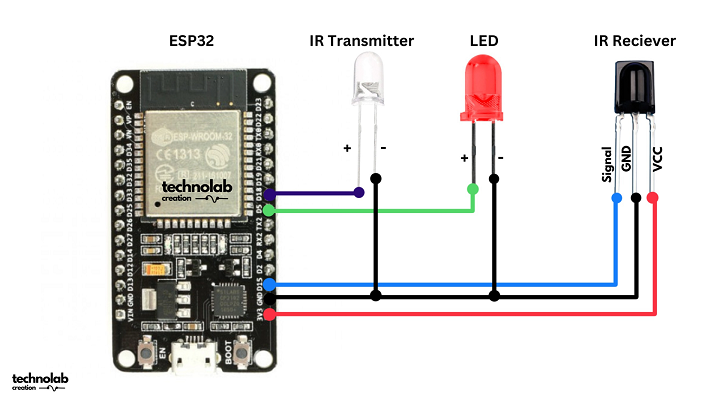
Next, select the transmitter and receiver pins. I have connected the IR transmitter LED to pin 18 and the receiver to GPIO 15. Select these pins according to your hardware setup.
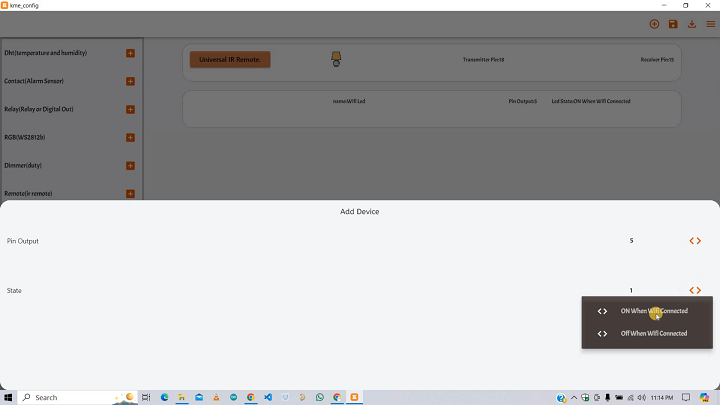
Select the pin output for the WiFi LED; I have connected the WiFi LED to pin 5. Choose the behavior for the WiFi LED—whether it should be on when WiFi is connected or on when WiFi is not connected. I am selecting “ON when WiFi is connected.”
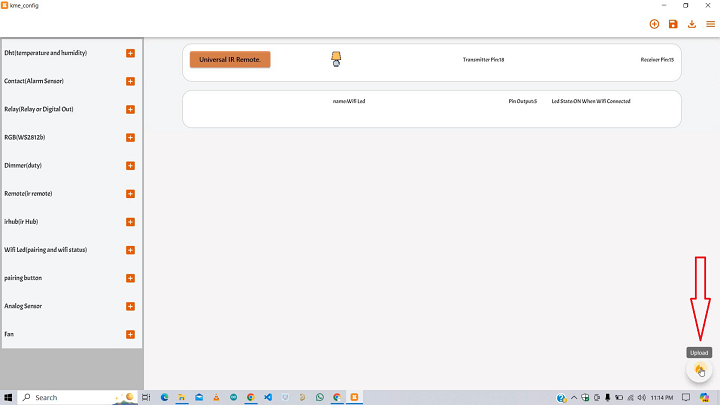
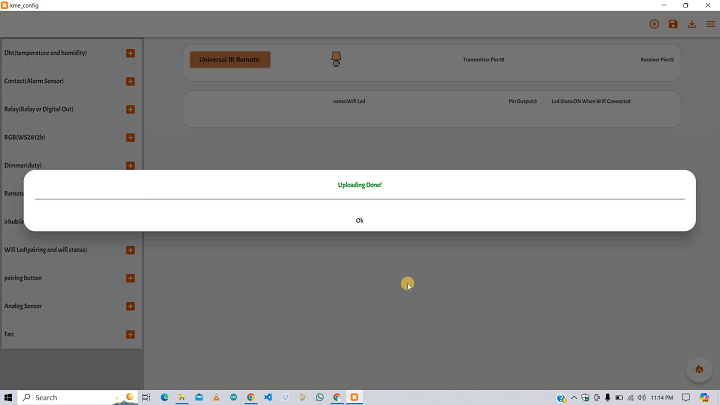
After configuring everything, save the device configuration file. Click the upload button to upload the firmware.
Now that you have successfully configured the devices and uploaded the firmware, let’s move on to configuring the smartphone app and pairing the device with the app.
Smart-Phone App Configuration and Pairing.
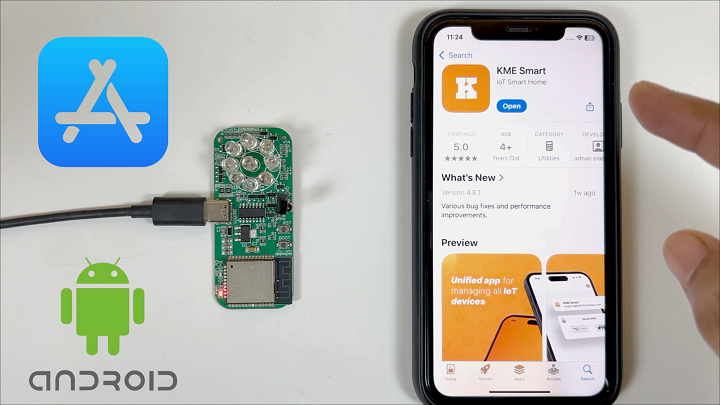
Download the KME Smart App on your phone. This app is available for both Android and iOS.
Once you’ve downloaded the KME Smart App, open it. If you’re using it for the first time, you’ll need to sign up. Since I’ve already signed up, I’ll skip this step.
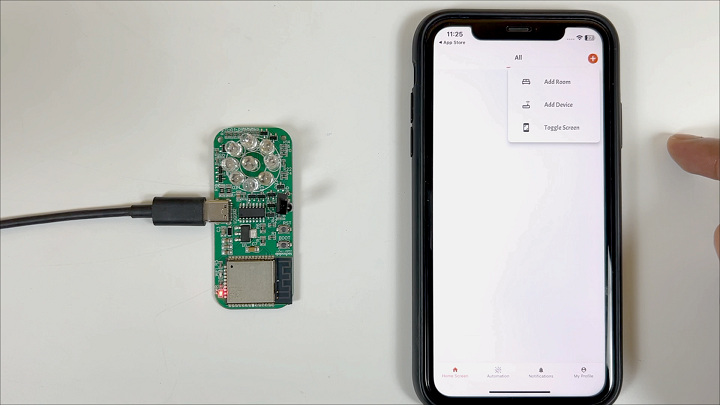
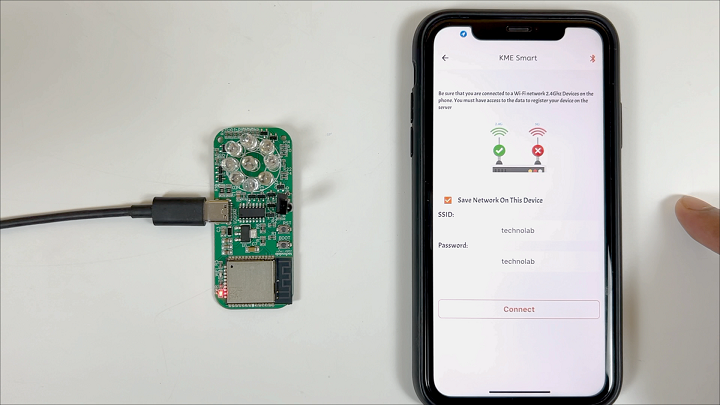
Next, click on the plus icon in the top right corner and tap on “Add devices.” Here, enter the SSID and password of your router or hotspot, ensuring that it is a 2.4GHz network.
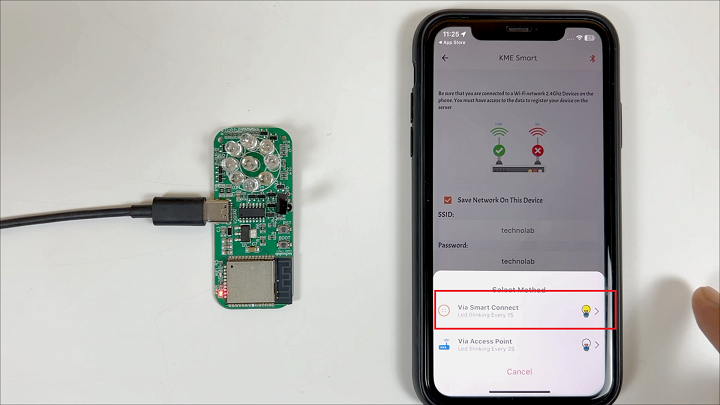
In my case, the WiFi credentials are already filled in because I saved them during testing. After entering your WiFi credentials, tap “Connect.” You’ll then be asked to select the pairing mode—either via Smart Connect or Access Point. For Access Point, press the boot button for 2 seconds to put the module into pairing mode via Smart Connect. You’ll know it’s in Smart Connect mode when the WiFi LED starts blinking every second. In the app, select “Via Smart Connect.”
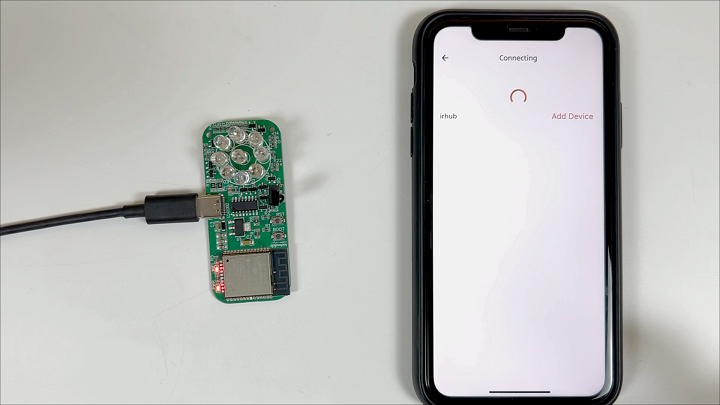
Choose “Single Device” for the scan type. It will take a few seconds to search for and pair with the ESP32.
Once the device is found, click on “Add device.” If you want, you can change the name of the device; I’ll name it Universal IR Remote.
When you open this device, you’ll find that two remotes—a remote for an air conditioner and a remote for a TV—are automatically added. If you need more remotes, you can add them, but in my case, I only need these two.
Now, let’s configure these remotes. I’ll be using the TV remote and the AC remote in my house.
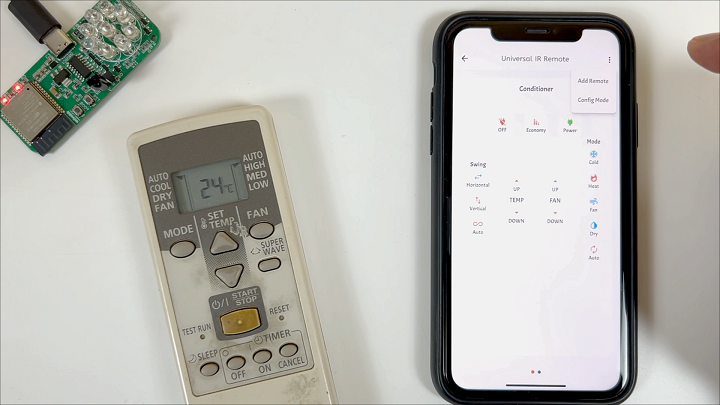
Click on the three-dash icon, then select “Config Mode.” Now we need to configure the buttons of the remote in the app.
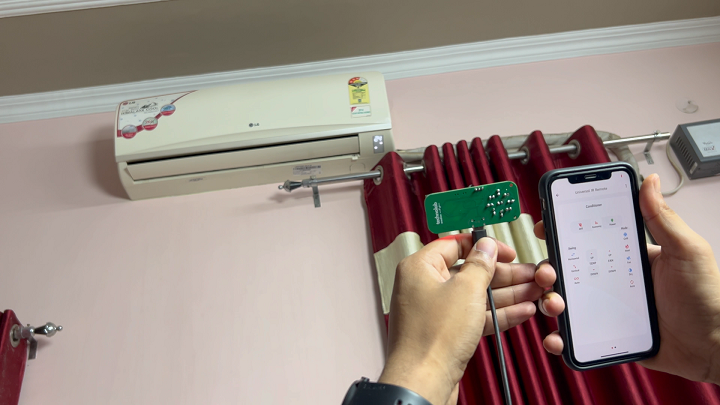
For the AC remote, I’ll add the Power ON/OFF button and the Temperature UP/Down buttons, as these are the most commonly used. Select the button in the app, then press the corresponding button on the remote, and it will automatically be added. Next, I’ll add the Temperature UP button—press the Temperature UP button in the app, then press it on the remote, and it will be added. Do the same for the Temperature Down button.
After configuring the AC remote, let’s move on to the TV remote.
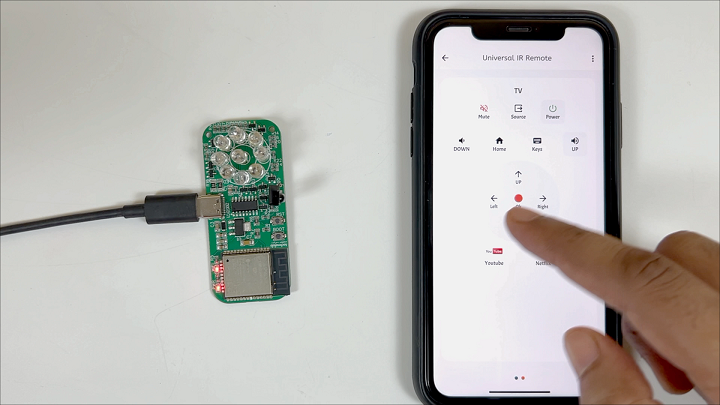
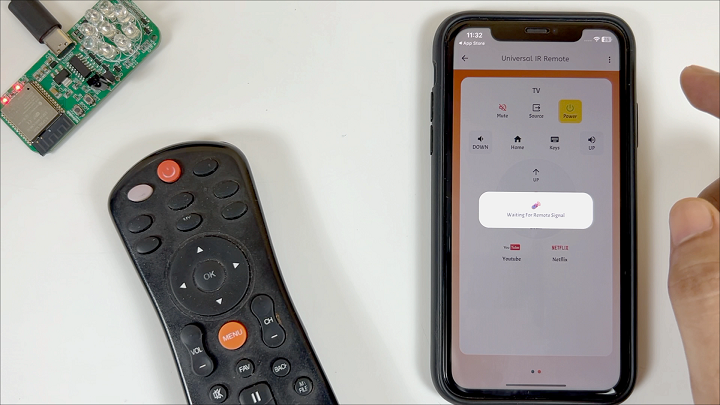
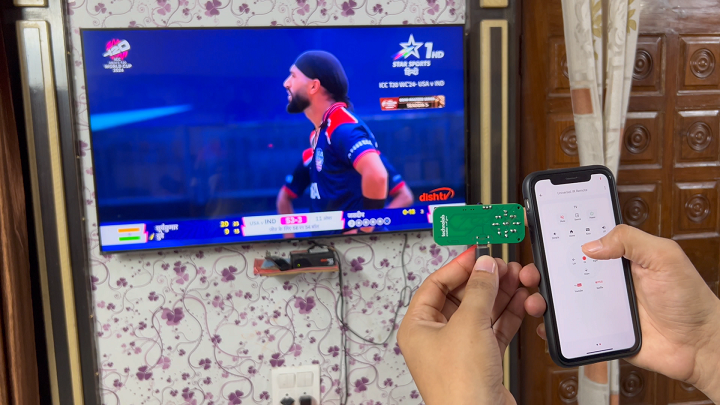
For the TV remote, I’ll add the Power ON/OFF button, Volume UP/DOWN buttons, Channel Change button, and Mute button. First, I’ll add the Power button—press the Power button in the app, then press it on the remote, and the button will be added successfully. Repeat this process for all the desired buttons. Now that I’ve added all the buttons for the AC and TV remotes, let’s see how they work.
As you can see, the WiFi LED is on, indicating that our ESP32 is connected to the WiFi. Let’s try controlling the AC and TV.
Now you can control your TV and AC directly from your smartphone, and you can do it from anywhere in the world.
Video Tutorial.
That’s it for this article. I hope you found it helpful and learned something new.
Download the KME Smart App and start creating some amazing projects. If you face any issues while configuring or pairing, feel free to contact me via WhatsApp at the number provided or by email at support@technolabelectronics.com.